Tire maintenance & safety
Tire inspection checklist: Your how-to guide

Free shipping
Best price guarantee
SimpleCrew exclusive savings
0% financing options
Tire replacement coverage
24/7 roadside assistance
Easy returns
Tire maintenance & safety


Your vehicle's tires are the only point of contact between you and the road, making them crucial for safety and performance. Neglecting tire maintenance can lead to premature wear, reduced fuel efficiency, and even dangerous situations like blowouts or loss of traction.
Regular tire inspections are essential for identifying potential issues before they become serious problems. By taking a few minutes to examine your tires, you can ensure a smoother, safer ride and extend the life of your tires.
A comprehensive tire inspection involves checking several key aspects, including tread depth, air pressure, damage, tire alignment, and age. This guide will walk you through the steps of performing a thorough tire inspection, empowering you to keep your vehicle in top shape.
A tire inspection is a systematic examination of your vehicle's tires to assess their condition and ensure they are safe for use. This process involves checking various aspects of the tires, such as tread depth, air pressure, sidewall condition, and overall wear patterns.
The primary goal of a tire inspection is to identify any potential issues that could compromise your vehicle's safety, handling, or performance. By catching problems early, you can address them promptly, preventing more serious and costly issues down the road.
Regular tire inspections are an essential part of vehicle maintenance. Experts recommend conducting a thorough tire check at least once a month and before any long road trips. Incorporating tire inspections into your routine can help you stay on top of your vehicle's health, ensuring a safer and more enjoyable driving experience.
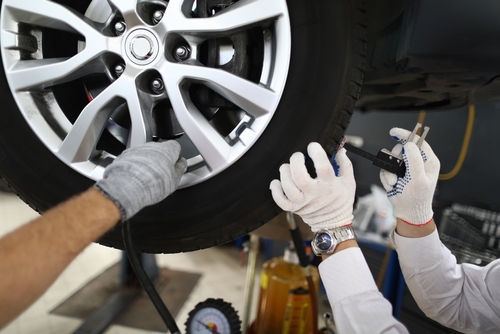
Tread depth is a critical factor in your tires' ability to maintain traction, especially in wet or slippery conditions. To check your tread depth, use a penny or a tread depth gauge:
Adequate tread depth is crucial for maintaining grip on the road, preventing hydroplaning, and ensuring your vehicle can stop safely. If your tires are worn beyond the recommended limits, it's essential to replace them promptly.
Proper tire inflation is vital for optimal performance, fuel efficiency, and even tire wear. To check your tire pressure:
Underinflated tires can lead to decreased fuel economy, reduced handling, and increased wear on the tire's edges. Overinflated tires may result in a harsher ride and increased wear on the center of the tread. Maintaining the correct tire pressure helps optimize your vehicle's performance and extend your tires' life.
During your inspection, carefully examine each tire for signs of damage or irregular wear:
If you notice any damage or irregularities, it's best to have a professional assess the tire's condition. In some cases, repairs may be possible, while more severe damage may require tire replacement. Addressing these issues promptly helps ensure your safety on the road.
Proper tire alignment is essential for even wear and optimal handling. Signs of misalignment include:
If you suspect an alignment issue, have your vehicle inspected by a professional. Regular alignment checks and adjustments can help extend your tires' life and improve your vehicle's overall performance.
Even if your tires appear to be in good condition, it's important to consider their age. Tires can degrade over time, even if they haven't been used extensively. To determine your tires' age:
As tires age, the rubber compounds can deteriorate, leading to decreased performance and increased risk of failure. Monitoring your tires' age and replacing them when necessary helps ensure your vehicle remains safe and reliable.
Don't forget about your spare tire during your inspections. A functional spare can be a lifesaver in case of a flat or blowout. To check your spare tire:
Regular spare tire checks ensure that you're prepared for unexpected tire issues while on the road. If your spare tire is damaged or significantly aged, consider replacing it to maintain your peace of mind.
Valve stems and caps play a crucial role in maintaining proper tire pressure. During your inspection:
Properly functioning valve stems and caps help maintain tire pressure and protect the valve from dirt and moisture, which can lead to leaks or damage over time.

In addition to regular inspections, there are several steps you can take to extend the life of your tires and ensure optimal performance:
By incorporating these tire inspection and maintenance practices into your regular routine, you can ensure your vehicle remains safe, efficient, and reliable on the road. At SimpleTire, we understand the importance of properly maintained tires for your safety and peace of mind. When you're ready to shop for new tires, let us help you find the perfect set at the best price, so you can get back to enjoying the journey with confidence.
Search By